博文

REFLECTION

图片
INTRODUCTION This assignment will carry out a targeted analysis of some of the tasks that have been completed before, summarizing the existing problems, and then giving the best solutions to the emergent stages according to the problems. Through analysis and summarization, I can learn more about what I have learned at this stage. BRIEF REVIEW Project 1 - The foundation study of making different metal shapes. Through the first half of the semester, we learned to use different methods and equipment to make different shapes of metal. At the same time, we can explore the different shapes in the production process, so that the shape of the metal can be as we expected.  In project 1, we were allowed to exercise shape-making techniques by making different shapes. At this time, we learned more about using different tools and metal production equipment in the workshop. On the other hand, the complex shapes in project 2 can be better prepared by the learning in project 1. Project

PROJECT 2 - MOTORCYCLE FUEL TANK

图片
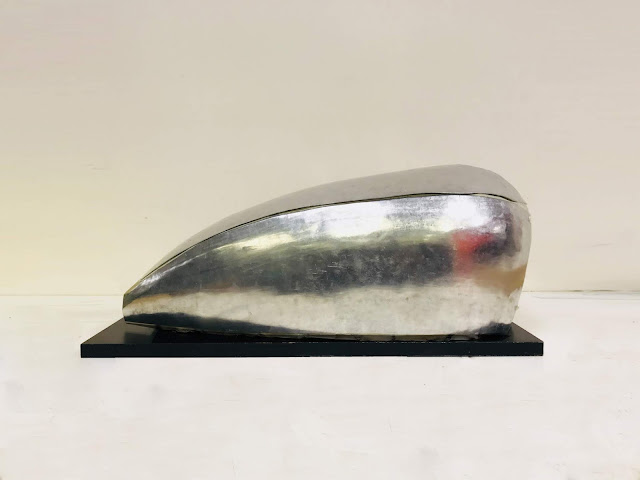
INTRODUCTION In project 2, we will use the aluminum sheet to imitate a motorcycle's fuel tank in group work. At the beginning of the project, we will make a group of 10 people to make 1:1 tank grinder so that we can compare it with our work later. In the second step, we will divide into group 3-5 people to imitate the fuel tank. During this time, everyone in the group will make different parts of the fuel tank and then complete the entire project through the final combination. The image shows the final work we have been done Top view Side view Since none of us has motorcycle. We decided to maximize the use of the tank by smashing ir into trash... to let off our frustration :)

WEEK 5 - METAL BLISTER MAKING

图片
INTRODUCTION This week, we used a hollow abrasive tool to strike out the middle part of the aluminum sheet in a concave blister shape. The image shows the final work I have been done in this week. Bottom view Top view n the following content, I will show all the steps that how to make the aluminum sheet become a blister. STEP 1 Firstly, cut the aluminum sheet into a square that will be smaller than the square formed by the four screws on the abrasive tool. Then place the aluminum sheet in the middle of two identical abrasive tools, and fix the abrasive tool with screws so that the aluminum sheet cannot be moved in the abrasive tool. Place the aluminum sheet in the middle of two identical abrasive tools Cut the aluminum sheet into a square STEP 2 First, use a metal hammer to strike the middle of the aluminum sheet. By continuous tapping, the entire middle part becomes an arc. Use a metal hammer to strike the middle of the aluminum sheet